Configuring JReport with Drill
JReport is an embeddable BI solution that empowers users to analyze data and create reports and dashboards. JReport accesses data from Hadoop systems through Apache Drill. By visualizing data through Drill, users can perform their own reporting and data discovery for agile, on-the-fly decision-making.
You can use JReport 13.1 and the Apache Drill JDBC Driver to easily extract data and visualize it, creating reports and dashboards that you can embed into your own applications. Complete the following simple steps to use Apache Drill with JReport:
- Install the Drill JDBC Driver with JReport.
- Create a new JReport Catalog to manage the Drill connection.
- Use JReport Designer to query the data and create a report.
Step 1: Install the Drill JDBC Driver with JReport
Drill provides standard JDBC connectivity to integrate with JReport. JReport 13.1 requires Drill 1.0 or later. For general instructions on installing the Drill JDBC driver, see Using JDBC.
-
Locate the JDBC driver in the Drill installation directory on any node where Drill is installed on the cluster:
/jars/jdbc-driver/drill-jdbc-all- .jar -
Copy the Drill JDBC driver into the JReport
libfolder: %REPORTHOME%\lib
For example, on Windows, copy the Drill JDBC driver jar file into:C:\JReport\Designer\lib\drill-jdbc-all-1.0.0.jar -
Add the location of the JAR file to the JReport CLASSPATH variable. On Windows, edit the
C:\JReport\Designer\bin\setenv.batfile: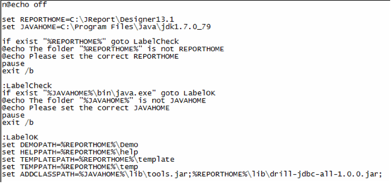
-
Verify that the JReport system can resolve the hostnames of the ZooKeeper nodes of the Drill cluster. You can do this by configuring DNS for all of the systems. Alternatively, you can edit the hosts file on the JReport system to include the hostnames and IP addresses of all the ZooKeeper nodes used with the Drill cluster. For Linux systems, the hosts file is located at
/etc/hosts. For Windows systems, the hosts file is located at%WINDIR%\system32\drivers\etc\hostsHere is an example of a Windows hosts file: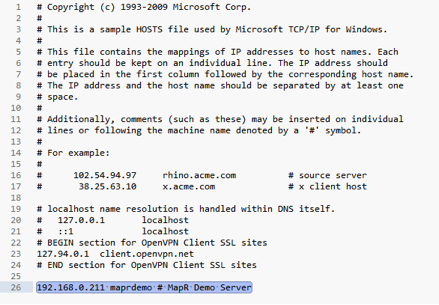
Step 2: Create a New JReport Catalog to Manage the Drill Connection
- Click Create New -> Catalog…
- Provide a catalog file name and click … to choose the file-saving location.
- Click View -> Catalog Browser.
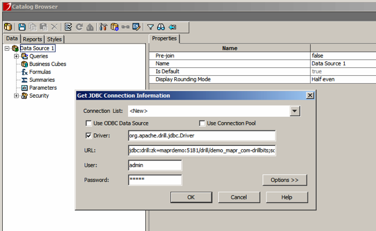
- Right-click Data Source 1 and select Add JDBC Connection.
- Fill in the Driver, URL, User, and Password fields.
- Click Options and select the Qualifier tab.
- In the Quote Qualifier section, choose User Defined and change the quote character from “ to ` (backtick).
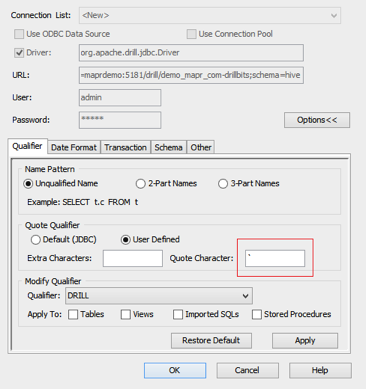
- Click OK. JReport will verify the connection and save all information.
- Add tables and views to the JReport catalog by right-clicking the connection node and choosing Add Table. Now you can browse the schemas and add specific tables that you want to make available for building queries.
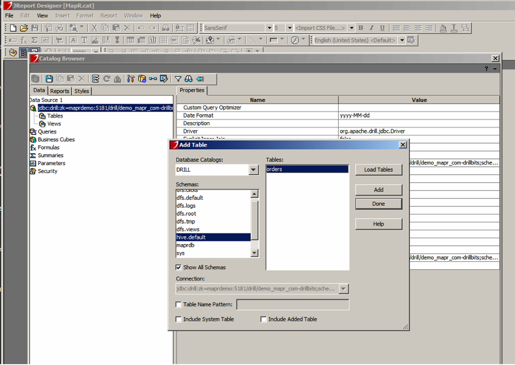
- Click Done when you have added all the tables you need.
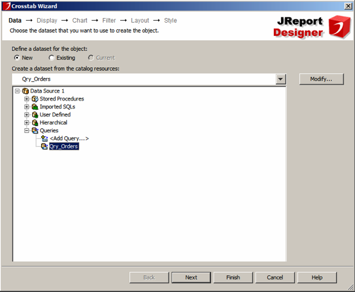
Step 3: Use JReport Designer
- In the Catalog Browser, right-click Queries and select Add Query…
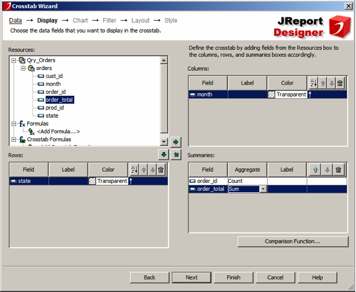
- Define a JReport query by using the Query Editor. You can also import your own SQL statements.
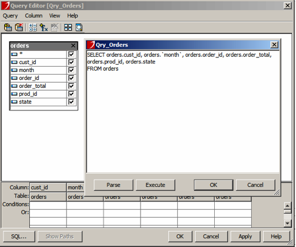
-
Click OK to close the Query Editor, and click the Save Catalog button to save your progress to the catalog file. Note: If the report returns errors, you may need to edit the query and add the schema in front of the table name:
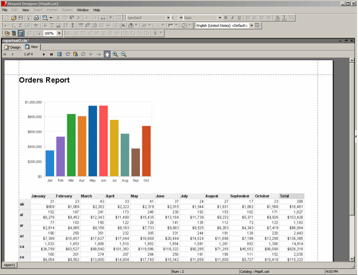
select column from schema.table_nameYou can do this by clicking the SQL button on the Query Editor. - Use JReport Designer to query the data and create a report.