
Using Apache Drill with Tableau 9 Server
This document describes how to connect Tableau 9 Server to Apache Drill and explore multiple data formats instantly on Hadoop, as well as share all the Tableau visualizations in a collaborative environment. Use the combined power of these tools to get direct access to semi-structured data, without having to rely on IT teams for schema creation and data manipulation.
To use Apache Drill with Tableau 9 Server, complete the following steps:
- Install the Drill ODBC driver from MapR on the Tableau Server system and configure ODBC data sources.
- Install the Tableau Data-connection Customization (TDC) file.
- Publish Tableau visualizations and data sources from Tableau Desktop to Tableau Server for collaboration.
Step 1: Install and Configure the MapR Drill ODBC Driver
Drill uses standard ODBC connectivity to provide easy data-exploration capabilities on complex, schema-less data sets. The latest release of Apache Drill. For Tableau 9.0 Server, Drill Version 0.9 or higher is recommended.
Complete the following steps to install and configure the driver:
- Download the 64-bit MapR Drill ODBC Driver for Windows from the following location:
http://package.mapr.com/tools/MapR-ODBC/MapR_Drill/ Note: Tableau 9.0 Server works with the 64-bit ODBC driver. - Install the 64-bit ODBC driver on Windows.
- Configure the driver.
- If Drill authentication is enabled, select Basic Authentication as the authentication type. Enter a valid user and password.
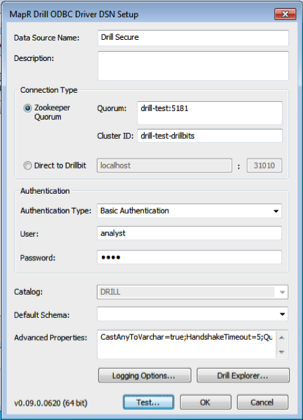
Note: If you select ZooKeeper Quorum as the ODBC connection type, the client system must be able to resolve the hostnames of the ZooKeeper nodes. The simplest way is to add the hostnames and IP addresses for the ZooKeeper nodes to the %WINDIR%\system32\drivers\etc\hosts file. 
Also make sure to test the ODBC connection to Drill before using it with Tableau.
Step 2: Install the Tableau Data-connection Customization (TDC) File
The MapR Drill ODBC Driver includes a file named MapRDrillODBC.TDC. The TDC file includes customizations that improve ODBC configuration and performance when using Tableau.
For Tableau Server, you need to manually copy this file to the Server Datasources folder:
- Locate the
MapRDrillODBC.tdcfile in the~\Program Files\MapR Drill ODBC Driver\Resourcesfolder. - Copy the file to the
~\ProgramData\Tableau\Tableau Server\data\tabsvc\vizqlserver\Datasourcesfolder. - Restart Tableau Server.
For more information about Tableau TDC configuration, see Customizing and Tuning ODBC Connections
Step 3: Publish Tableau Visualizations and Data Sources
For collaboration purposes, you can now use Tableau Desktop to publish data sources and visualizations on Tableau Server.
Publishing Visualizations
To publish a visualization from Tableau Desktop to Tableau Server:
-
For best results, verify that the ODBC configuration and DSNs (data source names) are the same for both Tableau Desktop and Tableau Server.
-
Create visualizations in Tableau Desktop using Drill as the data source.
-
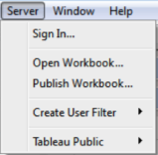
Connect to Tableau Server from Tableau Desktop. Select Server > Sign In.
-
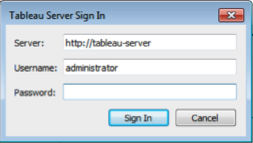
Sign into Tableau Server using the server hostname or IP address, username, and password.
-
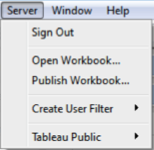
You can now publish a workbook to Tableau Server. Select Server > Publish Workbook.
-
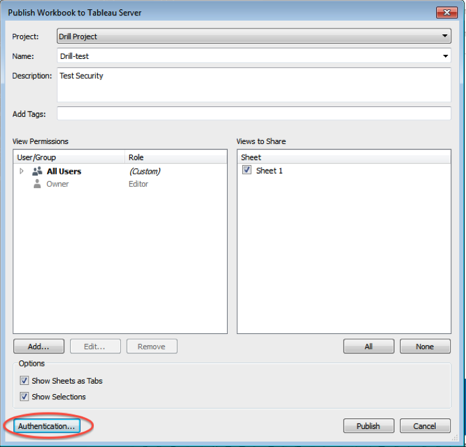
Select the project from the drop-down list. Enter a name for the visualization to be published and provide a description and tags as needed. Assign permissions and views to be shared. Then click Authentication.
-
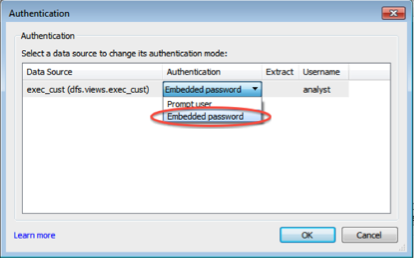
In the Authentication window, select Embedded Password, then click OK. Then click Publish in the Publish Workbook window to publish the visualization to Tableau Server.
Publishing Data Sources
If all you want to do is publish data sources to Tableau Server, follow these steps:
- Open data source(s) in Tableau Desktop.
-
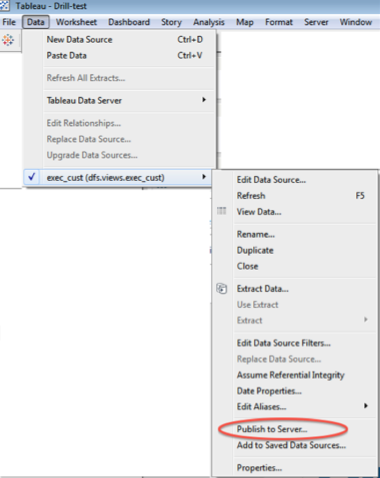
In the Workbook, select Data > Data Source Name > Publish to Server.
- If you are not already signed in, sign into Tableau Server.
-
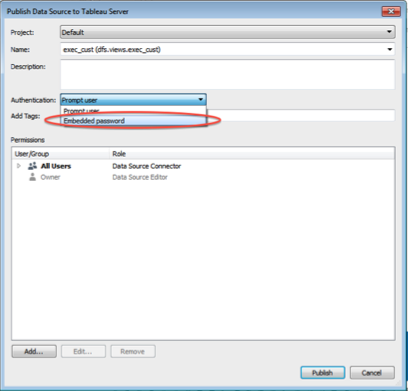
Select the project from the drop-down list and enter a name for the data source (or keep the same name that is used in the Desktop workbook).
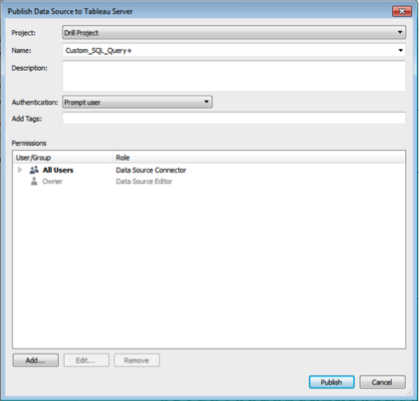
- In the Authentication drop-down list, select Embedded Password. Select permissions as needed, then click Publish. The data source will now be published on the Tableau Server and is available for building visualizations.
In this quick tutorial, you saw how you can configure Tableau Server 9.0 to work with Tableau Desktop and Apache Drill.