
Using Saiku Analytics with Apache Drill
You can connect Saiku Analytics to Apache Drill and explore multiple data sources including, CSV, Log Files, SQL data sources, Hadoop, S3 data and more. Apache Drill and Saiku Analytics are a perfect combination for data discovery on an Enterprise Level.
This document provides you with the procedures to install Saiku Analytics and connect it to Apache Drill.
To use Saiku Analytics with Apache Drill you just need to complete the following steps:
- Configure a connection in Saiku Analytics.
- Authenticate.
- Select datasource and load the data model.
- Analyse data with Saiku Analytics and Apache Drill.
Prerequisites
- Apache Drill installed. See Install Drill.
- Saiku Analytics installed. See Install Saiku.
Configure a connection in Saiku Analytics
You will need to sign into Saiku as an admin user and go to the Admin Console using the button on the top menu bar:

Then on the side menu under the Data Source Management section, click Add Data Source and fill in the form with the following information:
- Name - (This can be anything you like)
- Connection Type - Mondrian
- URL -
jdbc:drill:zk=<IP ADDRESS>:<PORT>/drill/drill-cluster - Schema - (Leave blank. Will auto fill once you have created a schema)
- JDBC Driver -
org.apache.drill.jdbc.Driver - Username - (If you haven’t enabled authentication then leave blank)
- Password - (If you haven’t enabled authentication then leave blank)

So it should look something like this.
For more information on using the JDBC driver click here.
Select datasource and load the data model
What is a schema?
A schema in its raw form is an XML document that defines how the data is laid out in your database. Within Saiku you might have multiple schemas, each containing multiple cubes. Within a cube are collections of Dimensions and Measures. The schema allows Saiku to display the UI elements that lets users discover answers to their data in a drag and drop format.
How the Schema Designer works
Enterprise Only
The schema designer is designed to allow users to get started in a much simpler fashion with minimal understanding of schema design and creation.
Please be aware the schema designer is not foolproof and whilst it will attempt to create a functional schema, some user interaction may be required to complete the schema itself.
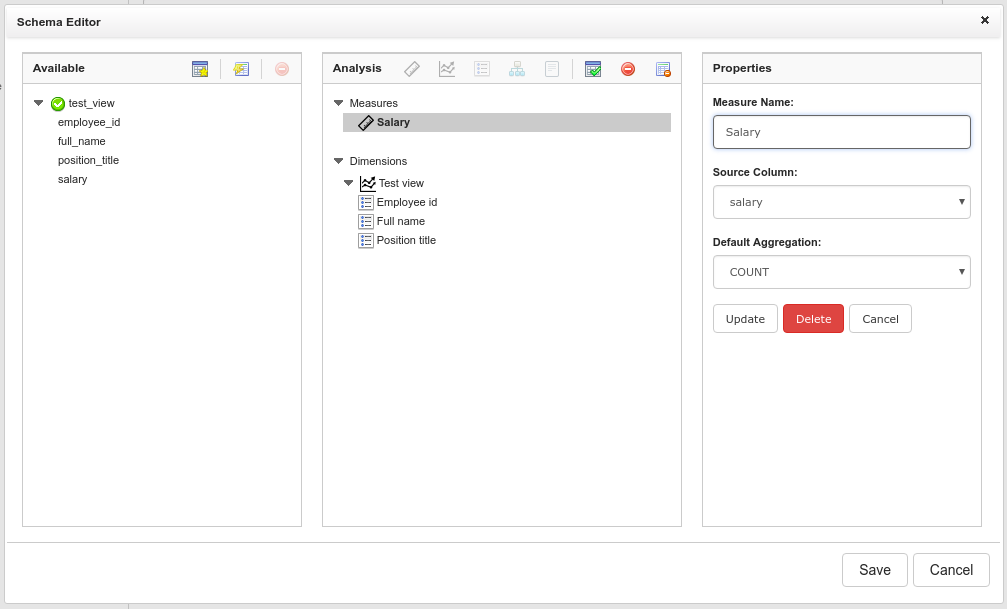
Once you have set up a connection in Saiku Analytics, next click on the Create Schema button at the bottom of the window.
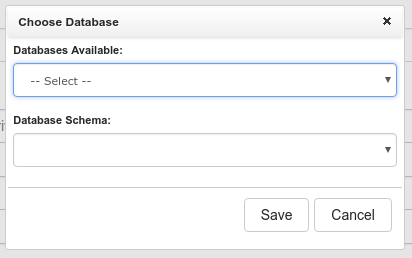
This should then popup a dialog asking you to select the database and schema you want to use to create your schema. Like this:
Next you’ll be displayed a new window that lists all the tables available to you in the left most column. The centre column is where you will define your dimensions and measures and the right hand column currently asks you to select a fact table. See the image below:
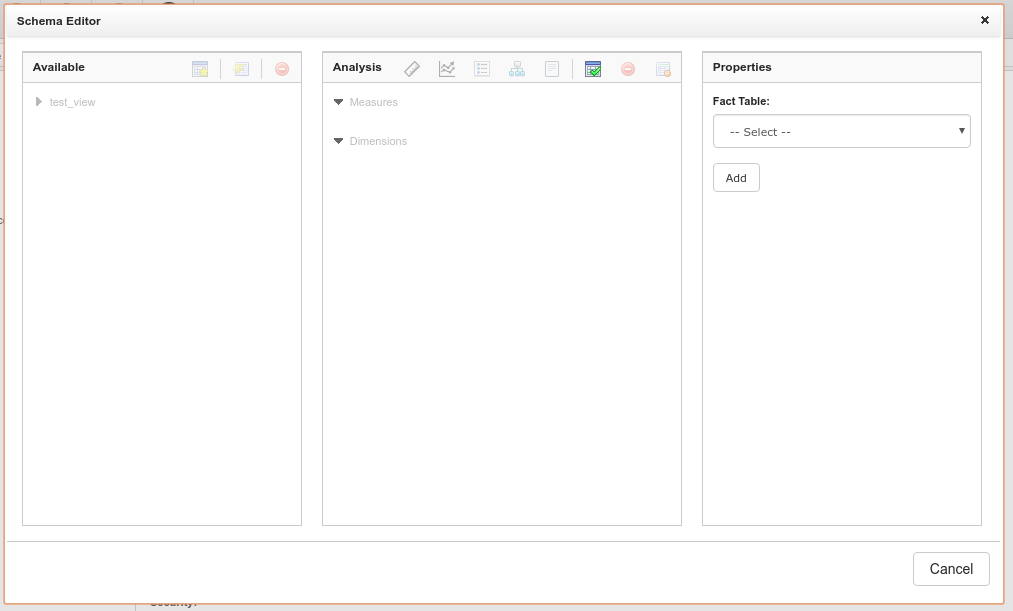
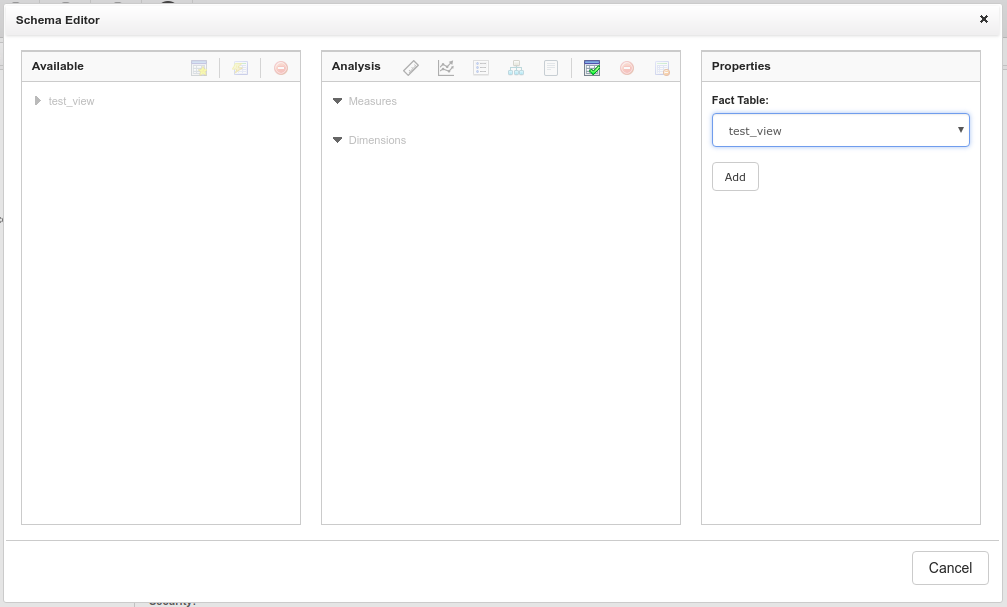
The fact table is the table you will select to create your Measures.
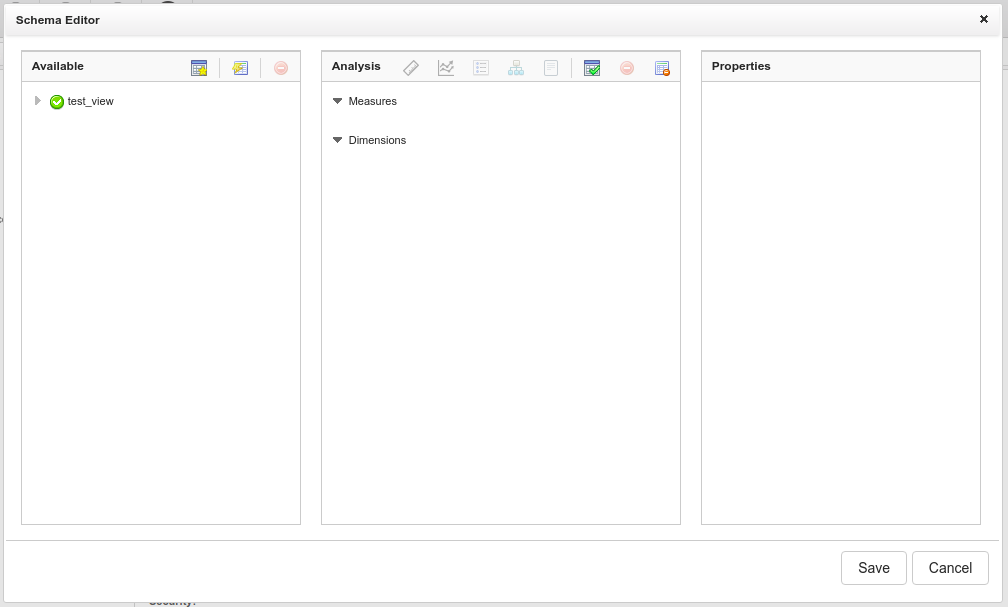
Once you select a fact table you should see a green icon appear in the table list next to that table name. Example:
Saiku Schema Designer incorporates an automatic schema designer which will attempt to build a usable schema automatically for you. Of course this depends on your underlying data and how it is structured in the database but it’s a pretty good way of getting started.
If you click the auto generate button it will perform the following scans to try and build a functioning schema:
- Create measures from all numeric fields in the selected fact table. Out of the box these will all be simple sums, but you can of course change these to suit your metric. Similarly, if it creates a measure that makes no sense you can remove it afterwards.
- Create dimensions from all tables that aren’t the defined fact table, unless you are using a single table database or CSV datasource in which case it will create degenerate dimensions from the fact table.
- Create dimension attributes for all text fields in your dimension table.
- Scan all the created dimensions for matching column names in the fact table and define the join. For example, if you have a dimension table with a column named
customer_idand a field in your fact table that is also calledcustomer_id, Saiku will consider this field to be a match and assign the various keys to make the joins. - Lastly Saiku will remove any dimensions it did not find a match for so you aren’t left with unusable dimensions.
Once this has run you are free to manipulate the generated schema as you desire to finish off any additional functionality or change names, attribute definitions and so forth.
If you don’t want to use the schema designer that’s not a problem. To create a schema you just need to define 1 or more measure and 1 or more dimension from your database.
Once you are happy with the schema, all you have to do is hit the save button which will save it to the repo and make it available to the users.
Analyse data with Saiku Analytics and Apache Drill
To interrogate your data within Saiku you simply need to create a new query, select the cube you have created using the schema designer and you’re good to go. To find out more about how to use Saiku Analytics click here or watch these short videos:
Using Juju to deploy Apache Drill
You can utilise the power of Juju to allow for a straight forward deployment with zero configuration, enabling you to discover data, faster.
- Sign in to jujucharms.com.
- Click here to view the Apache Drill charm.
- Click
Add to Model. - Search for the Zookeeper charm and click the result.
- Click
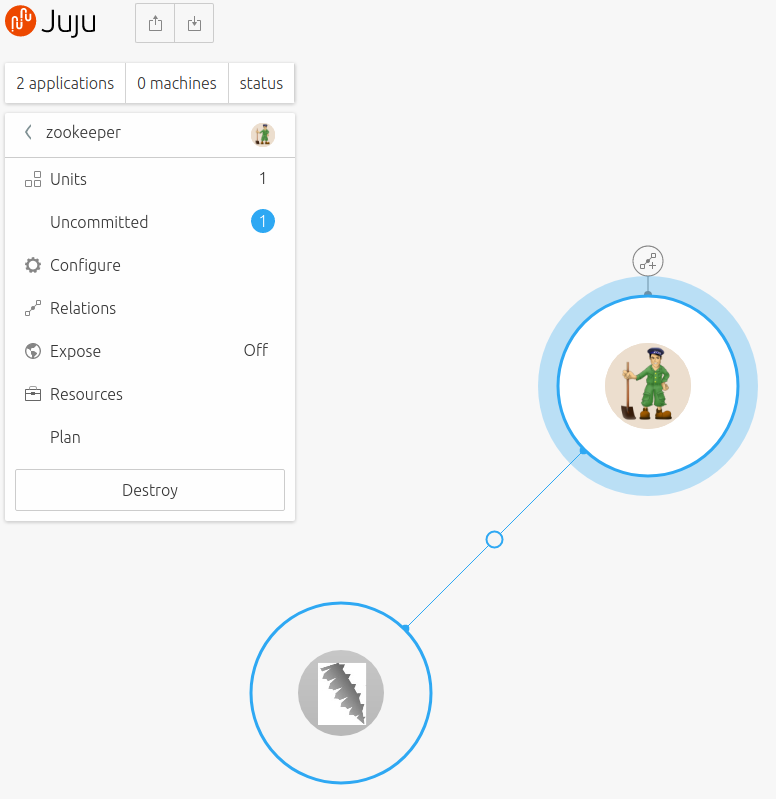
Add to Model. - Go to the Juju canvas.
- Use the relationship handle to create the relation between Zookeeper and Apache Drill.
- Click
Deploy changes.
Once all of the charms have deployed (this will be highlighted when the rings around the charms turn grey) simply follow these next steps:
Adding Data To Apache Drill
To access the Apache Drill user interface run the following command from your terminal:
juju expose apache-drill
Then navigate to the machine IP address on port 8047 on your browser.
Testing Apache Drill
Apache Drill is supplied with a sample dataset that allows you to test its functionality quickly and easily. To use this dataset you can run a query similar to the following within the Apache Drill UI:
SELECT * FROM cp.`employee.json` LIMIT 20
or:
SELECT full_name, salary, gender FROM cp.`employee.json` where gender = 'F'
As you can see from the query, this is infact running SQL directly over a JSON file.
Importing Data
Now is a good time to start importing your data. For this guide we will supply some test data which is available here.
To upload it to the server you can run the following command from your terminal:
juju scp sales.tar.bz2 apache-drill/0:~
This has uploaded the test CSV file to the server. Next we unzip it and place iy within the data storage pool.
juju ssh apache-drill/0
sudo mv sales.tar.bz2 /var/snap/apache-drill-spicule/common
cd /var/snap/apache-drill-spicule/common
sudo bunzip2 sales.tar.bz2
sudo tar xvf sales.tar
It is now available for interrogation.
Querying Data
You’ll have noticed in the previous operation we unzipped multiple CSV files. One great feature of Drill is directory level querying of identically formatted files. Let’s take a look.
Firstly in Drill click on the storage tab and update the DFS plugin.
Below the tmp block add the following:
    "test": {
      "location": "/var/snap/apache-drill-spicule/common",
      "writable": true,
      "defaultInputFormat": null,
      "allowAccessOutsideWorkspace": false
    }
And below it set:
{
  "skipFirstLine": false,
  "extractHeader": true,
}
within the CSV block. Then click the update button.
Let’s start with a query like:
SELECT * FROM dfs.test.`/sales` limit 10
This should return the first 10 rows of sales data. The files are chunked by year so lets try another query:
SELECT distinct `Year` FROM dfs.test.`/sales`
As you can see we’re now running SQL over multiple CSV files in a single query as it should return 2012, 2013, 2014. This allows you to chunk up your data into smaller CSV blocks and still interrogate the data as one.